Saturday, September 22, 2012
Remodelaholic Feature!
My little blog was recently featured at i heart Organizing which was such an awesome experience, and today Remodelaholic is featuring my kitchen remodel! I can't believe the interest everywhere beautiful has gotten lately! I have loved getting to know the blogging world, everyone is so inspiring and encouraging! Thank you everyone for taking a minute to stop by!
Monday, September 17, 2012
Hidden Kitchen Organization
What I love most about having this blog is that it keeps me motivated to work on all my projects around the house. I also love finding ideas and inspiration from all of your blogs and I hope my blog does the same for you!
Lately I have really been working on organizing the unseen areas of our home (cupboards, drawers, closets, etc.). Today I'll share the progress I have made in our unseen kitchen spaces.
1.
First up is the space beneath the kitchen sink.
This is a space that gets used all throughout the day. It's where we keep our trash, along with cleaners, soaps and dish gloves.
I started by cleaning out the cupboard and getting rid of any empty bottles or unneeded items.
Next I put down some cute contact paper I picked up at the dollar store. I love that contact paper can make the normally ugly space under the sink pretty!
It was sometimes hard to find what I was looking for because the cupboard is so deep and dark so I needed a way to easily see everything. I had an extra Antonius wire basket left over from when I organized my hall closet that was the perfect solution! It holds everything I need and can slide out like a drawer, so even the things in the back are easily accessible.
I also added a 3M Command hook to the inside of one of the doors to hang my dish gloves.


2.
In our kitchen we have very limited drawer space. There is one huge drawer and 4 tiny drawers. I have come to really like my giant everything drawer and I like it even more now! It holds every cooking utensil I have plus all of our silverware. Making sure everything has a specific place has been the key to keeping this drawer efficient. Again, I used the same contact paper from the dollar store along with a few wire containers also from the dollar store.


3.
 I have finally figured out how to keep a junk drawer organized! So what's the secret? Don't treat it like a "junk" drawer! Instead of it being a catchall be more thoughtful about it. Before I stick anything in there I think to myself "Is this really the best, most efficient place for this item?" and it really has worked! Of course my husband will throw just about anything in there but it's nothing I can't handle. If I happen to see something that doesn't belong I take it out right away. It has been great being able to find a clothes pin or pair of scissors so easily!
4.
Next is a simple one. I like to go through the mail as soon as it comes in the house. Most of it goes straight into the recycling bin but what about the rest? Here is our handy place to keep mail from cluttering up counter space.


5.
Lastly, we have some organized upper cabinets.
Keeping our canned food organized was always hard because the cabinet is so deep and I could only see what was in the very front. I found these can organizers for a buck each (there are two in there), they make every can visible so I can easily see what we have. We keep the bulk of our canned food in a food storage room in the basement, so the kitchen cabinets don't get too cluttered.


Our spice cupboard had the same problem as the canned food but since the spices are so much smaller than the cans, I needed a different solution.

Now, don't laugh (Okay, I guess you can laugh) but I have been using a few spaghetti boxes to raise the spices. It actually has been working out perfectly!


As for everything else in the cabinet, like with the junk drawer, it all has a specific place. It's easier than you'd think to just put the salt or whatever you used, back in the same place. I love opening an organized cupboard everyday and I never would have thought that it would be so easy to keep it this neat!

The more spaces I organize the more I realize how easy it is to keep it that way. Going the extra mile to make the space pretty is just more to motivate you to keep it nice and neat.
Like always, I'd love to hear any tips you have found for keeping your kitchen organized and efficient!
-Chloe
Lately I have really been working on organizing the unseen areas of our home (cupboards, drawers, closets, etc.). Today I'll share the progress I have made in our unseen kitchen spaces.
1.
First up is the space beneath the kitchen sink.
 |
| Before |
 |
| After |
I started by cleaning out the cupboard and getting rid of any empty bottles or unneeded items.
Next I put down some cute contact paper I picked up at the dollar store. I love that contact paper can make the normally ugly space under the sink pretty!
It was sometimes hard to find what I was looking for because the cupboard is so deep and dark so I needed a way to easily see everything. I had an extra Antonius wire basket left over from when I organized my hall closet that was the perfect solution! It holds everything I need and can slide out like a drawer, so even the things in the back are easily accessible.
I also added a 3M Command hook to the inside of one of the doors to hang my dish gloves.


2.
In our kitchen we have very limited drawer space. There is one huge drawer and 4 tiny drawers. I have come to really like my giant everything drawer and I like it even more now! It holds every cooking utensil I have plus all of our silverware. Making sure everything has a specific place has been the key to keeping this drawer efficient. Again, I used the same contact paper from the dollar store along with a few wire containers also from the dollar store.


3.
 I have finally figured out how to keep a junk drawer organized! So what's the secret? Don't treat it like a "junk" drawer! Instead of it being a catchall be more thoughtful about it. Before I stick anything in there I think to myself "Is this really the best, most efficient place for this item?" and it really has worked! Of course my husband will throw just about anything in there but it's nothing I can't handle. If I happen to see something that doesn't belong I take it out right away. It has been great being able to find a clothes pin or pair of scissors so easily!
4.
Next is a simple one. I like to go through the mail as soon as it comes in the house. Most of it goes straight into the recycling bin but what about the rest? Here is our handy place to keep mail from cluttering up counter space.


5.
Lastly, we have some organized upper cabinets.
Keeping our canned food organized was always hard because the cabinet is so deep and I could only see what was in the very front. I found these can organizers for a buck each (there are two in there), they make every can visible so I can easily see what we have. We keep the bulk of our canned food in a food storage room in the basement, so the kitchen cabinets don't get too cluttered.


Our spice cupboard had the same problem as the canned food but since the spices are so much smaller than the cans, I needed a different solution.
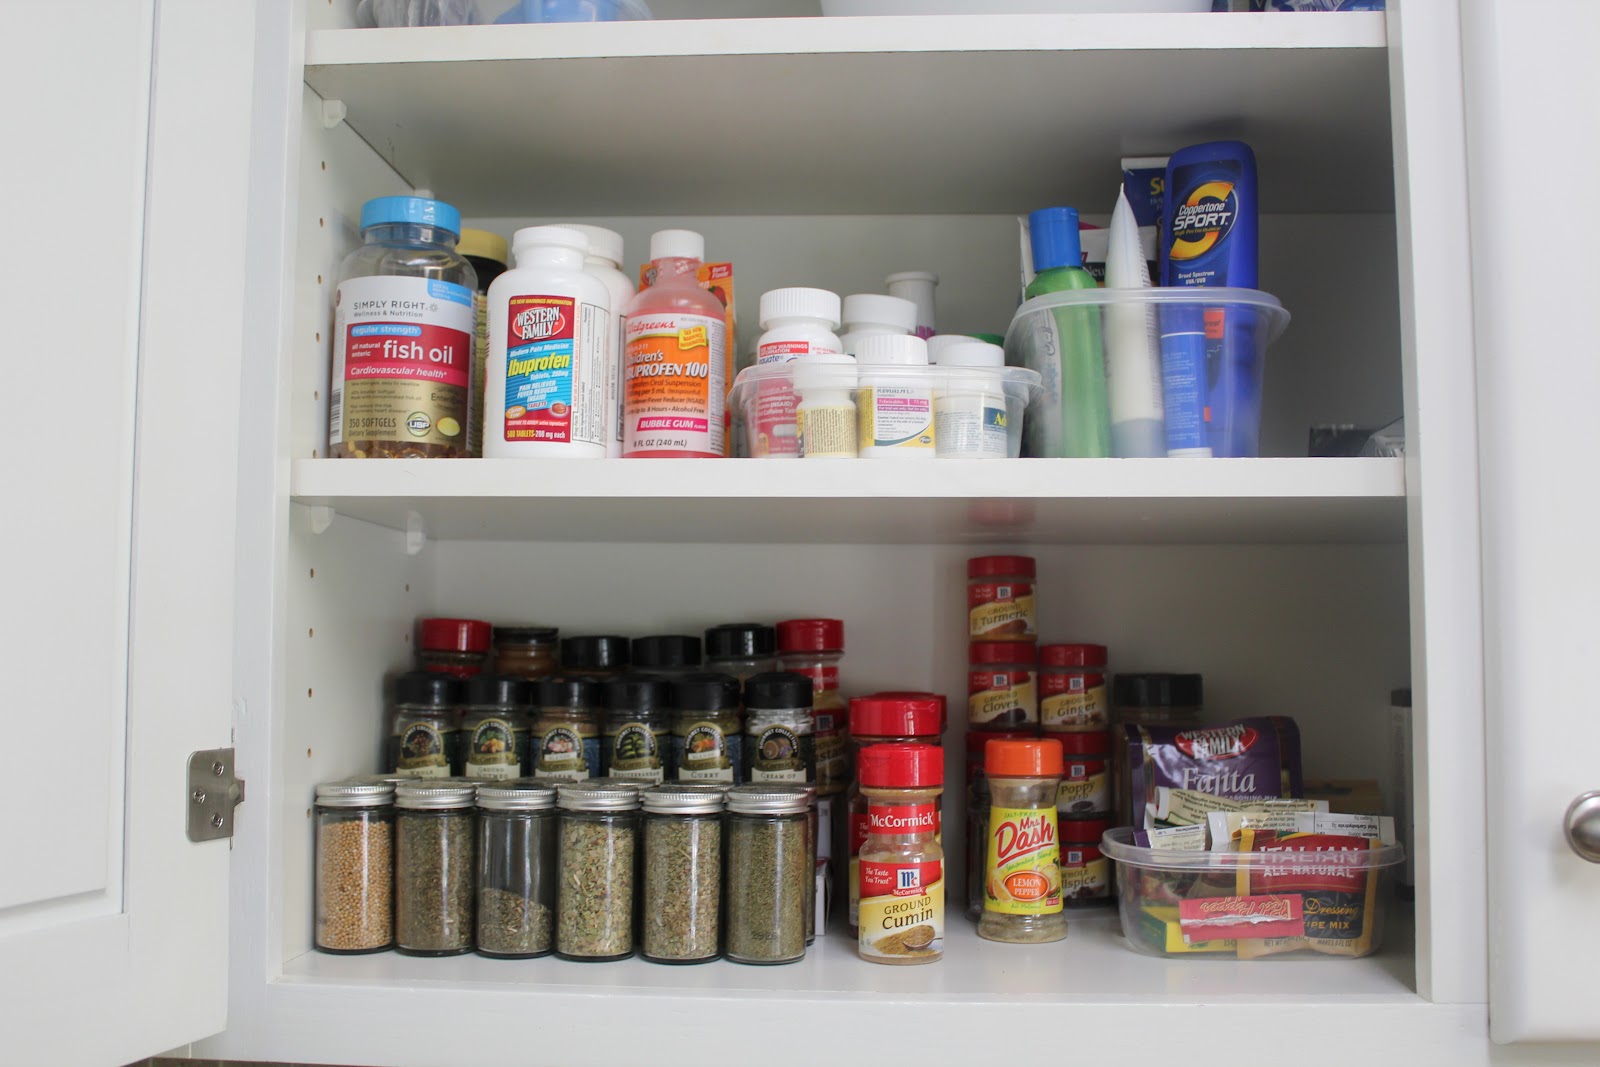
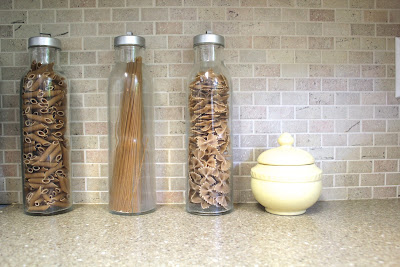
Now, don't laugh (Okay, I guess you can laugh) but I have been using a few spaghetti boxes to raise the spices. It actually has been working out perfectly!


As for everything else in the cabinet, like with the junk drawer, it all has a specific place. It's easier than you'd think to just put the salt or whatever you used, back in the same place. I love opening an organized cupboard everyday and I never would have thought that it would be so easy to keep it this neat!
The more spaces I organize the more I realize how easy it is to keep it that way. Going the extra mile to make the space pretty is just more to motivate you to keep it nice and neat.
Like always, I'd love to hear any tips you have found for keeping your kitchen organized and efficient!
-Chloe
Friday, September 7, 2012
Kitchen Remodel: Big Results on a Not So Big Budget
Crisp white kitchen cabinets have been my dream ever since I can remember (I couldn't have been the only 12 year old dreaming of remodeling my future kitchen? Right?), So when my husband and I were shopping for a house I was specifically looking for a kitchen with potential. I was hoping for icky looking cabinets that were sturdy and in good shape, plus a layout that would work.


When I saw this kitchen I knew exactly what I needed to do to make it look like this


I have learned that there are a few very important (in my opinion) things that are often overlooked during a remodel. Of course there are the big changes like painting the cabinets and installing new countertops, but I want to talk about the smaller details that can make all the difference.
1. Add crown moulding to builder's grade cabinets.
Before we bought our house I began to notice that cabinets in high end kitchens usually had thick beautiful crown moulding along the top. This is an easy change that I think has the biggest impact of any I will mention here. I also added bead board to the sides of my cabinets but that is just a personal style choice.


2. Stager upper cabinets
 We raised the cabinet above the microwave and popped it forward a couple inches too. I think it gives the kitchen more of a custom feel. I wish now that we had also raised the cabinet above the refrigerator but that can be done another day I guess!
3. Cut out center of cabinet door and add glass
I had no idea how simple this would be! We just cut out the center panels then took the doors to a glass place (I'm sorry, I really don't know what else to call it!) and they installed a pane of glass in each. The best part is that it only cost 20 bucks for the two of them!


4. Add new hardware
New pulls and knobs give you a chance to personalize your kitchen a little more. Replacing old knobs may be a given but if your kitchen doesn't already have any to begin with I would definitely add some. When it comes to hinges, they will make cabinets look fresh and clean (plus hinges are totally cheap so you really can't lose!).


5. A new faucet
A pretty faucet will liven up the kitchen! I got mine at Costco for a great deal and it had all the practical features I was looking for.

6. Backsplash
We went with tile but there are lots of options. All the tile for our backsplash cost about $200 which I thought was a good deal but you could definitely spend a lot less and still have good results. Shop around for your tile, don't just choose from the selection at the big chain stores. I prefer a more neutral colored backsplash as opposed to a fun, trendy colored one that may not be trendy for long. You can always add color with accessories that can be changed out whenever you feel like it.
7. Remove outdated features
In my case I had one of those...what are they called? Appliance garage? Not really sure. All I knew was that it had to go, and look at all the extra counter space i've got now!
That's it! If you have any other advise to add I'd love to hear it!
-Chloe
If you like my style be sure to stop by my etsy shop for handmade decor!


When I saw this kitchen I knew exactly what I needed to do to make it look like this


I have learned that there are a few very important (in my opinion) things that are often overlooked during a remodel. Of course there are the big changes like painting the cabinets and installing new countertops, but I want to talk about the smaller details that can make all the difference.
1. Add crown moulding to builder's grade cabinets.


2. Stager upper cabinets
 We raised the cabinet above the microwave and popped it forward a couple inches too. I think it gives the kitchen more of a custom feel. I wish now that we had also raised the cabinet above the refrigerator but that can be done another day I guess!
3. Cut out center of cabinet door and add glass
I had no idea how simple this would be! We just cut out the center panels then took the doors to a glass place (I'm sorry, I really don't know what else to call it!) and they installed a pane of glass in each. The best part is that it only cost 20 bucks for the two of them!


4. Add new hardware
New pulls and knobs give you a chance to personalize your kitchen a little more. Replacing old knobs may be a given but if your kitchen doesn't already have any to begin with I would definitely add some. When it comes to hinges, they will make cabinets look fresh and clean (plus hinges are totally cheap so you really can't lose!).


5. A new faucet
A pretty faucet will liven up the kitchen! I got mine at Costco for a great deal and it had all the practical features I was looking for.

6. Backsplash
We went with tile but there are lots of options. All the tile for our backsplash cost about $200 which I thought was a good deal but you could definitely spend a lot less and still have good results. Shop around for your tile, don't just choose from the selection at the big chain stores. I prefer a more neutral colored backsplash as opposed to a fun, trendy colored one that may not be trendy for long. You can always add color with accessories that can be changed out whenever you feel like it.

7. Remove outdated features
 |
| Before |
 |
| After |
That's it! If you have any other advise to add I'd love to hear it!
-Chloe
If you like my style be sure to stop by my etsy shop for handmade decor!

Monday, September 3, 2012
Circus Party
My son's circus birthday party was so much fun to plan. Thanks to my endless searching online and at the dollar store, making things ourselves, and borrowing what we could from friends, we only spent about $100!
I wish I had been able to get some pictures before the kids started to arrive but it was a crazy day. Luckily I do have a bunch of pics from during the party! Enjoy!

I absolutely loved making the invitations and signs! There are so many cute circusy fonts you can download for free! I got most of my fonts here, just search "circus" or "carnival".

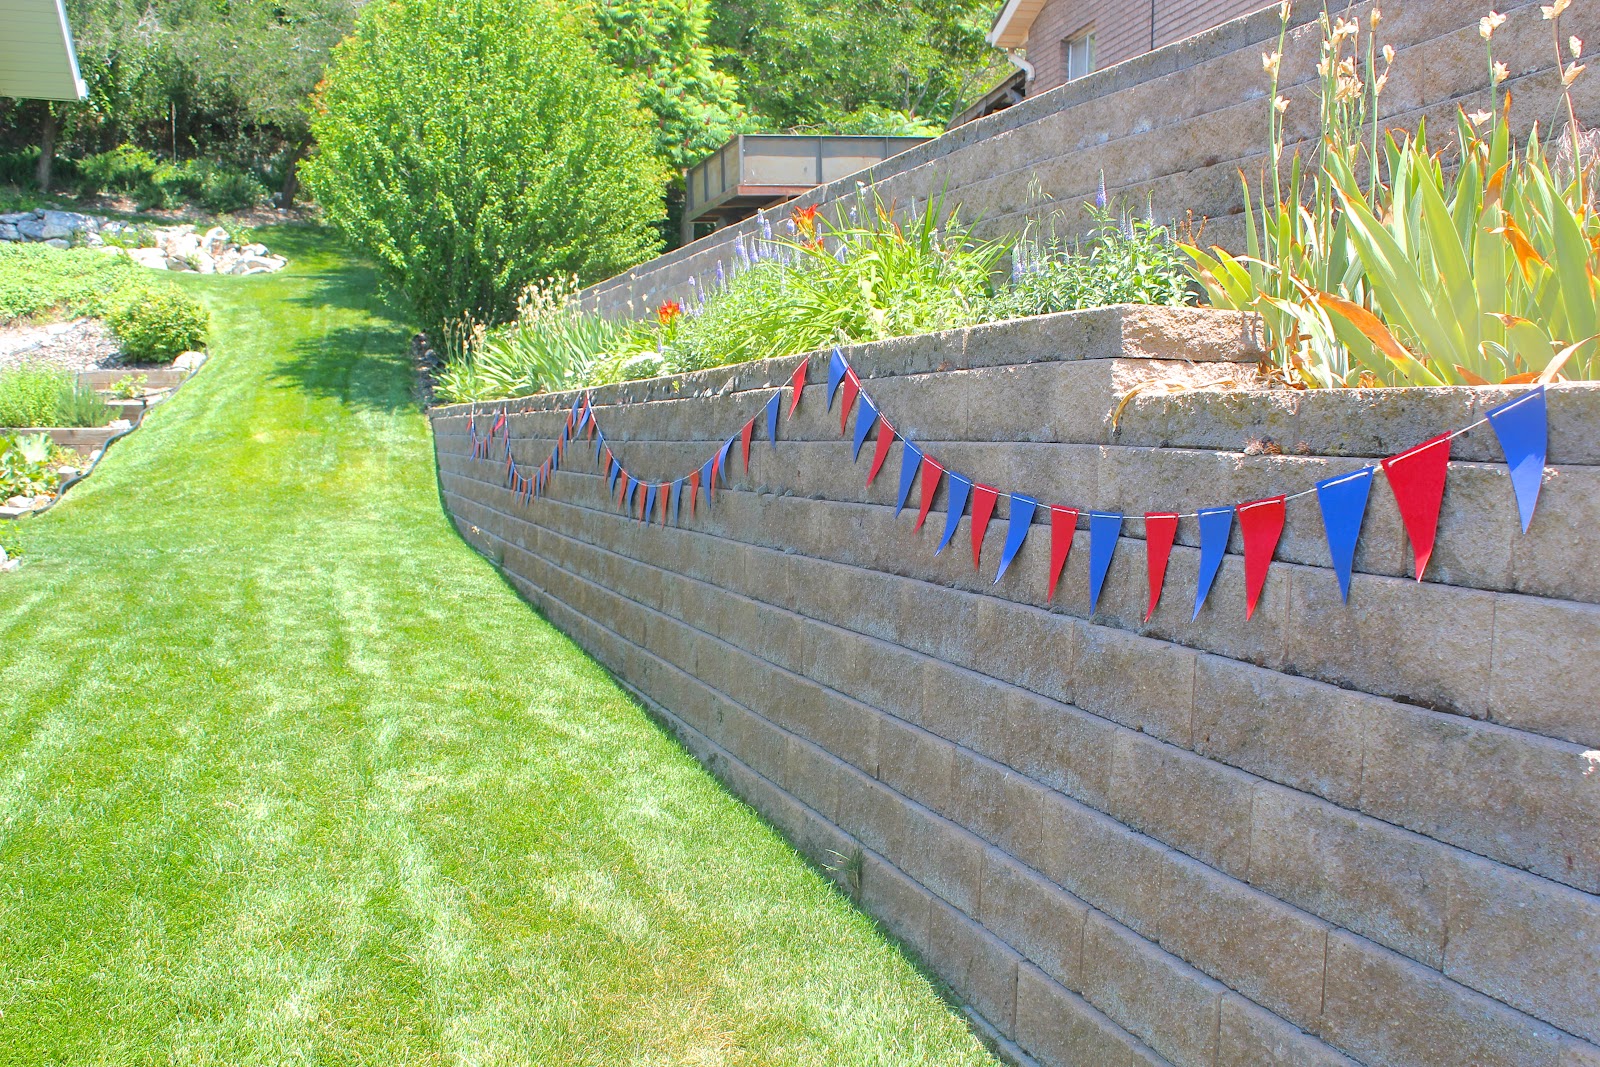 "Welcome to the Circus!" I got the idea for these signs from some things I saw on Pinterest. The banner is just made out of some old poster board that had been used on one side.
The goodie bags are dollar store bags (10 for a buck) with labels that I made glued on the front.
Each party guest got a bag, a clown nose (I don't know how, but I don't have a singe picture of any kids wearing the clown noses!), a horn and unlimited tickets (also from dollar store) to use to play games.
The kids won a piece of candy at each carnival game so the bags were used to hold all their loot!

This was our "big top". I bought a red and white striped table cloth roll from Oriental Trading that had so many uses for this party!
The balance beam along with the other fun stuff under the tent I was able to borrow from someone who runs a gymnastics class.

The cake! This may be one of my favorite thing from the party. I found these adorable free printables to top off the cake. Notice how the ball on the seal's nose is really a lolly pop? I just can't get enough of this!

Corn dogs for lunch worked out well and we absolutely had to have cotton candy!


GAMES!


I got some temporary circus tatoos from Oriental Trading that were a hit!
And of course we couldn't have a circus without peanuts!

My husband downloaded a couple circus/carnival like albums that really helped create a fun circus atmosphere! The music was definitely my favorite part of the party!
I can't wait until his next birthday party! There are so many fun themes to choose from!
-Chloe
Subscribe to:
Posts (Atom)