Friday, November 16, 2012

Fall decor: Keeping It Simple


     Fall is such a magically beautiful time of year. All the colors, styles, and changing landscape put me in a sort of blissful fog. I stager around with my eyes wide open just wishing this feeling would last forever. 

This year I have had so much fun bringing that same magical fall feeling into our home. I think a lot of the time we think that fall decorations need to be dark, rich, and heavy but they DON'T! They can be light and simple, which is what I will be sharing today.

You won't find any porcelain pilgrims or wood cut-out turkeys. Instead, I've used plants we've gathered that bring an autumn feeling, along with other simple touches. 
The most important thing I've learned is to keep it simple.


In our Entry: A couple pumpkins that escaped being carved for halloween next to family outerwear (this has that magic fall feeling all over it!).


Pine cones and ribbon bring so much to the sconces, and the indian corn on the mirror seems so classically Thanksgiving. 


The front door: I saw something similar to this on Pinterest and altered it to fit my style. It was so easy, just pinecones, hot glue, and ribbon.


On the shelves: A bowl of pinecones, a bundle of dried grass, and some fall branches.  Each of these are gorgeous and... oh yeah, FREE! Even that bottle the branches are in is an old salad dressing bottle!


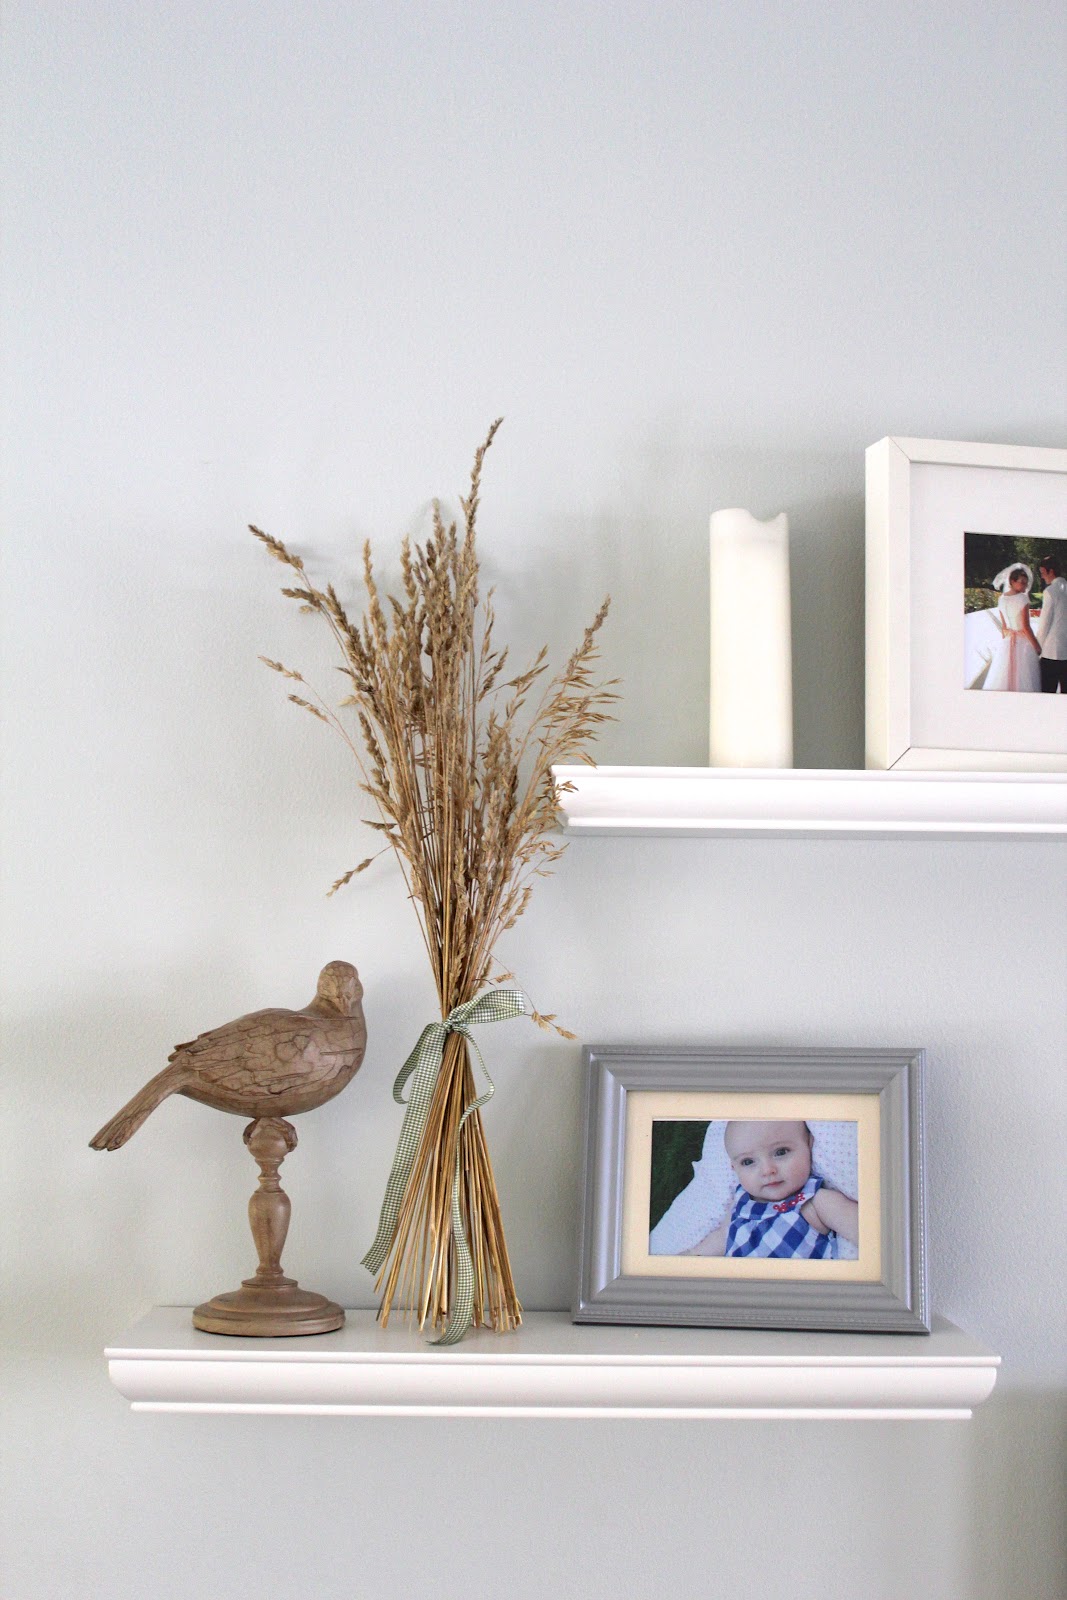
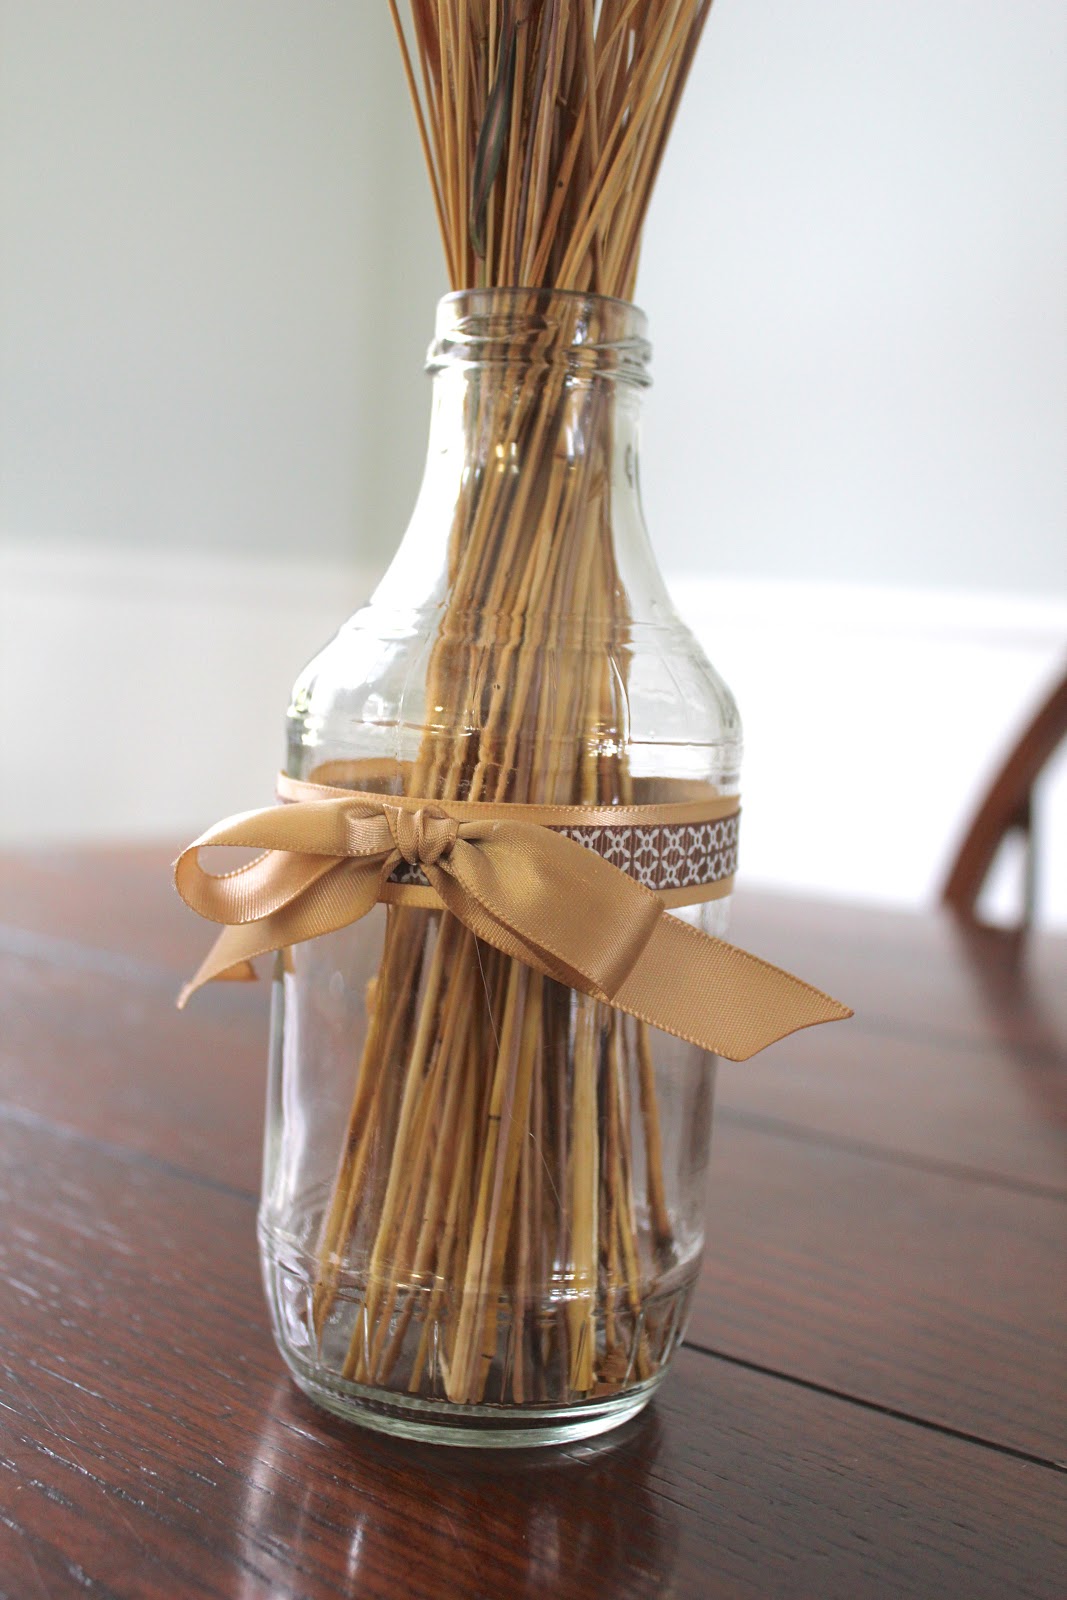
The Dining Table: I put some dried grass (from our yard) in an old bbq sauce bottle and wrapped it with ribbon. On the chandelier I just placed some branches I clipped from outside.


The white pumpkins are the ONLY actual fall decorations I own that are from a store, and I am obsessed with them. I love that they can be out from September through November!


End Table: place a leaf on the heated wax of a candle and when cooled, the leaf stays put. An easy, cheap way to get a more interesting candle. (The leaf was dried and pressed first, otherwise it would not have kept it's shape or color.)


Lastly: A little sweater pillow makes this room feel warm and cozy.


I still have no idea how I will be decorating the dining tables for Thanksgiving. Any Ideas on how to make it beautiful while leaving plenty of room for all the food?


-Chloe

Wednesday, October 24, 2012

Playroom Update 2: Kid's Art Display

(To read part 1 of my playroom update click here.)

I love the idea of using children's artwork to decorate the home. But what are we to do when our kids are bringing home a new painting from school every week? or even more often than that?

This is the solution we have come up with in our home to easily display and rotate artwork.


A place for each child to proudly display the art they worked to hard on. It can be admired and appreciated until we are ready to put up a new masterpiece! 


I started out with two black frames I picked up at Walmart. After removing the back and the glass I spray painted them white (If I could have found frames for the same price that were already white, it would have meant a little less work. Painting them was quick and easy though, so it didn't matter to me what color they were when I bought them.)

Then I used painter's tape to make the stripes, and a mini foam roller to apply the navy blue paint. Four coats of paint later and I was able to remove the tape! The foam roller really did a great job at limiting the paint bleeding underneath the tape.


I found this grey polka dot fabric in the remnant section for a super deal. All I had to do was hot glue a piece to the backing of the frame. The white matting came with the frame so I just popped that back into place.


The final step was just to attach these clips. I hot glued each one on and that was it! Done! Wasn't that easy?


So far I am loving theses display frames! Still have a lot to do (including painting the entire room!) but things are beginning to come together!


I would like to label them for each child somehow. I am thinking maybe a wooden initial hanging right above each frame. What do you think? Any other Ideas?


-Chloe


Monday, October 1, 2012

Playroom Update: Toy Storage

    A few months ago my husband and I decided on a budget to (I don't want to say "redo" because we never did it to begin with... so I'll go with "do") do our playroom. I got to planning, measuring, and shopping right away. We're going with a nautical theme for the room; aqua, navy, and white.

We had an awesome space in our basement but it wasn't functioning as well as it could.  The kids weren't spending a whole lot of time in there and since it was the ugliest, messiest room in the house, it wasn't exactly my favorite place to hang out either. When it was clean, that just meant all the toys were arranged on the floor or up against the wall. We still kept a lot of toys in the kid's bedrooms since there was no storage at all in the playroom.

Before

After scouring the internet (well, mostly Pinterest) for pictures of beautiful and functional playrooms, I decided what would work best for us, the space, and our budget was an Expedit shelving unit from Ikea. So, I know that using an Expedit in a playroom is no new thing. In fact, it seems to be in nearly every playroom on Pinterest, but that is just because it functions SOOO well for little ones and is a bargin at only $69.99! They can be used standing up vertically or laying horizontally which makes them very versatile. We bought two to put in the corner.


I also got 4 Knipsa Baskets from Ikea that fit perfectly in the spaces of the Expedit. These baskets are ultra sturdy and can fit a ton of toys! Perfect!

I wanted to label the baskets so my kids would be able to tell what is in each basket and to be able to help at clean up time. Since neither of our kids can read yet, the labels needed to have pictures instead of words. I found these mini chalkboards on Amazon at only $8 a dozen that work great. I wasn't a huge fan of the square hole that was in the middle of the baskets so I just hot glued the chalkboards right over it. There is still plenty of room at the top for your hand to pull the basket out.  I love that I can so easily change up what is on the label as my kid's toys change over time.


For smaller toys like cars and blocks, I bought 4 white metal buckets also from Amazon. These were kind of a splurge even though they were the cheapest buckets I could find this size. to add to the nautical theme I painted navy blue stripes on each bucket.

I used painter's tape and first gave them a coat of white (to create a seal and limit the blue paint bleeding under the tape) then a few coats of navy blue.


I really am in love with these buckets! I find myself wanting to use buckets to store things all over the house now!  They are just so darn cute!


That's all the toy storage for now.  We still have a lot of work to do in this room and I'll be sharing all the updates as they come along!


-Chloe If you like my style be sure to check out my etsy shop!

Saturday, September 22, 2012

Remodelaholic Feature!

My little blog was recently featured at i heart Organizing which was such an awesome experience, and today Remodelaholic is featuring my kitchen remodel! I can't believe the interest everywhere beautiful has gotten lately!  I have loved getting to know the blogging world, everyone is so inspiring and encouraging! Thank you everyone for taking a minute to stop by!

Monday, September 17, 2012

Hidden Kitchen Organization

What I love most about having this blog is that it keeps me motivated to work on all my projects around the house. I also love finding ideas and inspiration from all of your blogs and I hope my blog does the same for you!

Lately I have really been working on organizing the unseen areas of our home (cupboards, drawers, closets, etc.). Today I'll share the progress I have made in our unseen kitchen spaces.


1. 
First up is the space beneath the kitchen sink.
Before
After
This is a space that gets used all throughout the day. It's where we keep our trash, along with cleaners, soaps and dish gloves.
I started by cleaning out the cupboard and getting rid of any empty bottles or unneeded items.

Next I put down some cute contact paper I picked up at the dollar store. I love that contact paper can make the normally ugly space under the sink pretty!

It was sometimes hard to find what I was looking for because the cupboard is so deep and dark so I needed a way to easily see everything. I had an extra Antonius wire basket left over from when I organized my hall closet that was the perfect solution! It holds everything I need and can slide out like a drawer, so even the things in the back are easily accessible.

 I also added a 3M Command hook to the inside of one of the doors to hang my dish gloves.


2.
In our kitchen we have very limited drawer space. There is one huge drawer and 4 tiny drawers. I have come to really like my giant everything drawer and I like it even more now! It holds every cooking utensil I have plus all of our silverware. Making sure everything has a specific place has been the key to keeping this drawer efficient. Again, I used the same contact paper from the dollar store along with a few wire containers also from the dollar store.


3. 
I have finally figured out how to keep a junk drawer organized! So what's the secret? Don't treat it like a "junk" drawer! Instead of it being a catchall be more thoughtful about it. Before I stick anything in there I think to myself "Is this really the best, most efficient place for this item?" and it really has worked! Of course my husband will throw just about anything in there but it's nothing I can't handle. If I happen to see something that doesn't belong I take it out right away. It has been great being able to find a clothes pin or pair of scissors so easily!


4.
Next is a simple one. I like to go through the mail as soon as it comes in the house. Most of it goes straight into the recycling bin but what about the rest? Here is our handy place to keep mail from cluttering up counter space.


5.
Lastly, we have some organized upper cabinets.

Keeping our canned food organized was always hard because the cabinet is so deep and I could only see what was in the very front.  I found these can organizers for a buck each (there are two in there), they make every can visible so I can easily see what we have. We keep the bulk of our canned food in a food storage room in the basement, so the kitchen cabinets don't get too cluttered.


Our spice cupboard had the same problem as the canned food but since the spices are so much smaller than the cans, I needed a different solution.


Now, don't laugh (Okay, I guess you can laugh) but I have been using a few spaghetti boxes to raise the spices. It actually has been working out perfectly!


As for everything else in the cabinet, like with the junk drawer, it all has a specific place. It's easier than you'd think to just put the salt or whatever you used, back in the same place. I love opening an organized cupboard everyday and I never would have thought that it would be so easy to keep it this neat!


The more spaces I organize the more I realize how easy it is  to keep it that way.  Going the extra mile to make the space pretty is just more to motivate you to keep it nice and neat.

Like always, I'd love to hear any tips you have found for keeping your kitchen organized and efficient!


-Chloe

Friday, September 7, 2012

Kitchen Remodel: Big Results on a Not So Big Budget

Crisp white kitchen cabinets have been my dream ever since I can remember (I couldn't have been the only 12 year old dreaming of remodeling my future kitchen? Right?), So when my husband and I were shopping for a house I was specifically looking for a kitchen with potential. I was hoping for icky looking cabinets that were sturdy and in good shape, plus a layout that would work.


          When I saw this kitchen I knew exactly what I needed to do to make it look like this


I have learned that there are a few very important (in my opinion) things that are often overlooked during a remodel. Of course there are the big changes like painting the cabinets and installing new countertops, but I want to talk about the smaller details that can make all the difference.

1. Add crown moulding to builder's grade cabinets.

Before we bought our house I began to notice that cabinets in high end kitchens usually had thick beautiful crown moulding along the top. This is an easy change that I think has the biggest impact of any I will mention here. I also added bead board to the sides of my cabinets but that is just a personal style choice.


2. Stager upper cabinets

We raised the cabinet above the microwave and popped it forward a couple inches too. I think it gives the kitchen more of a custom feel. I wish now that we had also raised the cabinet above the refrigerator but that can be done another day I guess!


3. Cut out center of cabinet door and add glass

I had no idea how simple this would be! We just cut out the center panels then took the doors to a glass place (I'm sorry, I really don't know what else to call it!) and they installed a pane of glass in each. The best part is that it only cost 20 bucks for the two of them!


4. Add new hardware

New pulls and knobs give you a chance to personalize your kitchen a little more. Replacing old knobs may be a given but if your kitchen doesn't already have any to begin with I would definitely add some. When it comes to hinges, they will  make cabinets look fresh and clean (plus hinges are totally cheap so  you really can't lose!).


5. A new faucet

A pretty faucet will liven up the kitchen! I got mine at Costco for a great deal and it had all the practical features I was looking for.


6. Backsplash

We went with tile but there are lots of options. All the tile for our backsplash cost about $200 which I thought was a good deal but you could definitely spend a lot less and still have good results. Shop around for your tile, don't just choose from the selection at the big chain stores. I prefer a more neutral colored backsplash as opposed to a fun, trendy colored one that may not be trendy for long. You can always add color with accessories that can be changed out whenever you feel like it.


7. Remove outdated features

Before
In my case I had one of those...what are they called? Appliance garage?  Not really sure. All I knew was that it had to go, and look at all the extra counter space i've got now!

After


That's it! If you have any other advise to add I'd love to hear it!

-Chloe

If you like my style be sure to stop by my etsy shop for handmade decor!