Let's go back and remember where we started with the "before" pictures from our last house.
Pretty depressing, right?
The biggest challenge we had was with space. Specifically, the lack of space. This new loft playroom is about 1/4 the size of our old basement playroom. A couple of the bigger toys, like my daughter's kitchen and my son's rocking airplane, had to be moved to the kids bedrooms. This has worked out very well since their bedrooms are right next door to the playroom.
Okay, enough of this chitchat, lets get to the reveal!
Drumroll please......
I have already blogged about using two Expedit shelving units from Ikea for our toy storage (You can read all about our toy storage here) and they have been absolutely perfect! Toys are always neat and easy to find.
I made the curtains, and all new pillow shams (except for the "map"one which is from Ikea) to give new life to our old sofa. I bought the fabric for the curtains and used what was leftover to make the pillow shams along with some other fabric I had on hand.
For the small pillow, I made the same kind of knot I used on the lampshade (You can find that tutorial here) and some burlap ribbon I found in the floral department. I just kind of made the shams up as I went along but they all totally work! Don't you love it when that happens?
My son recently inherited a large Lego collection from my little brother. The Legos have been stored in this blue tub. The tub works well and fits perfectly in one of our cubbies, but I wanted to spruce it up a bit. I spray painted the front with chalkboard paint and added a piece of rope for a handle.
Ever since I first made these artwork display frames, I've wanted to label them somehow to make them specific to each child. I ended up making these rope initials.
 All I did was hot glue (you may have noticed by now that I am slightly obsessed with my glue gun and use it almost daily) rope to a piece of card stock in the shape of the letter, then cut it out with an X-acto knife.
The lantern I got a Walmart for less than 4 bucks. I thought it was cute black, but painting it white would help give the room the light airy feeling I was going for.
How many chalkboards can you fit in one playroom?
The answer is...well... A LOT!
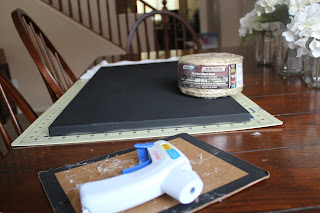
This chalkboard was originally a magnetic bulletin board from Ikea that we had in our home office. We hadn't been using it since the move, so I gave it a few coats of chalkboard paint and hot glued rope around the edge for a little extra charm. We had some old brightly colored magnet numbers that I decided to paint white and bring up to the playroom. To hold chalk and an eraser, I used a small pale I got at Target for a buck.


